Painting your house isn’t just about curb appeal—it actually protects your place from rain, sun, and everything else the weather throws at it. If you take your time and do it right, that paint job holds up for years. Rush it, and you’ll be out there scraping and repainting before you know it. This guide walks you through everything, from picking the right gear to figuring out the smartest order to tackle each part of the job. It doesn’t matter if you’re a first-timer or you’ve done this before—there’s something here to help you get a finish that lasts, and looks like you hired a pro.
How to Paint a House Exterior
Painting the outside of a house is more involved than just slapping on paint and calling it good. There’s a process: you’ve got to inspect the surfaces, prep them properly, fix anything that’s damaged, prime spots that need it, and then finally get to the actual painting. Most problems—like peeling and flaking—show up because someone tried to rush through prep or skipped steps. That’s the truth. When pros take on an exterior paint job, most of their time is spent getting everything ready. Painting is just the last part.
Start by really looking at your house. The material matters—a wood-sided house isn’t the same as stucco or brick. Each one needs a little different care. Think about things like old, peeling paint, moisture problems, sunlight, and how the temperature swings where you live. If you want a paint job that lasts, focus on prep and picking the right time to paint. That’s what really makes a difference.
And before you even buy a gallon of paint, take some time to pick a color that works for your home and the neighborhood. If you need ideas, check out “What Color Should I Paint My House Exterior?” for inspiration.
Got a brick house? Don’t just start painting—brick needs special treatment. Look up “How to Paint a Brick House” for step-by-step tips on getting it clean, primed, and painted so the finish actually holds up.
What Is the Proper Way to Paint the Exterior of a House?
Don’t grab a paintbrush just yet—first, carefully examine every part of your home’s exterior. Check the siding, the trim, even the foundation. If you spot any moisture damage, rotten wood, peeling paint, or cracked caulk, fix those first. Seriously, paint can only do so much—it won’t cover up real issues. Ignoring necessary repairs will quickly ruin your paint job.
After fixing any damage, focus on preparation: clean off dirt, mildew, and chalky remnants from previous paint. Scrape off anything loose, sand down the rough spots, and get the surface as smooth as you can. If you see shiny, glossy areas, scuff them up so the new paint has something to grip. Put primer on any bare wood or patched areas. And don’t forget caulk—fill gaps around windows, doors, and trim to keep water out, but leave vents or spots that need to breathe alone.
When everything’s clean, dry, and ready, now you can finally paint. Pick a day that’s not too hot, not too humid, and with steady weather—no blazing sun or rain on the way. Proper prep ensures the paint dries correctly and endures over time, keeping your home looking fresh and well-maintained for years.
In What Order Do You Paint the Exterior of a House?
When painting a house exterior, it’s best to start at the top and work your way down—gravity always affects paint. Beginning from higher surfaces lets you catch drips and runs before they dry, preventing messes and extra touch-ups.
Start with the eaves and gutters, then move on to the fascia and trim. After that, paint the siding or main walls, followed by doors and shutters. If your project includes the foundation, leave it for last. Following this top-to-bottom approach keeps your work organized, efficient, and results in a cleaner, more professional-looking finish.
Can I Paint Outside of My House Myself?
While many people attempt to paint their house exterior on their own, it’s important to think through a few practical factors before picking up a ladder and brush. First, think about accessibility. A single-story home on level ground is usually doable with basic tools and safety precautions. For two-story houses or steeply sloped yards, you’ll need sturdy ladders or scaffolding—working at height can be risky, and a fall isn’t worth trying to save a little money.
Next, assess the condition of your exterior surfaces. If the siding is generally in good shape—just a bit faded or dirty—the task is fairly simple: wash, let dry, and apply paint. But peeling paint, soft or rotting wood, cracked stucco, or failing caulk adds a lot more work. This is often where DIY projects get tricky: scraping, sanding, patching, and priming require time and effort, and skipping any of these prep steps usually leads to paint that fails quickly.
Finally, factor in the time commitment. Doing a house exterior paint job the right way takes more than a weekend—it’s a detailed process that demands patience and careful planning. Between cleaning, drying, repairing, priming, and applying at least two coats, the project can stretch over several days—and the weather has to cooperate. For busy homeowners or anyone facing unpredictable climate conditions, hiring a professional can be the safer and smarter choice for a long-lasting finish.
Step-by-Step: How to Repaint House Exterior Properly
1-Inspect the Surface
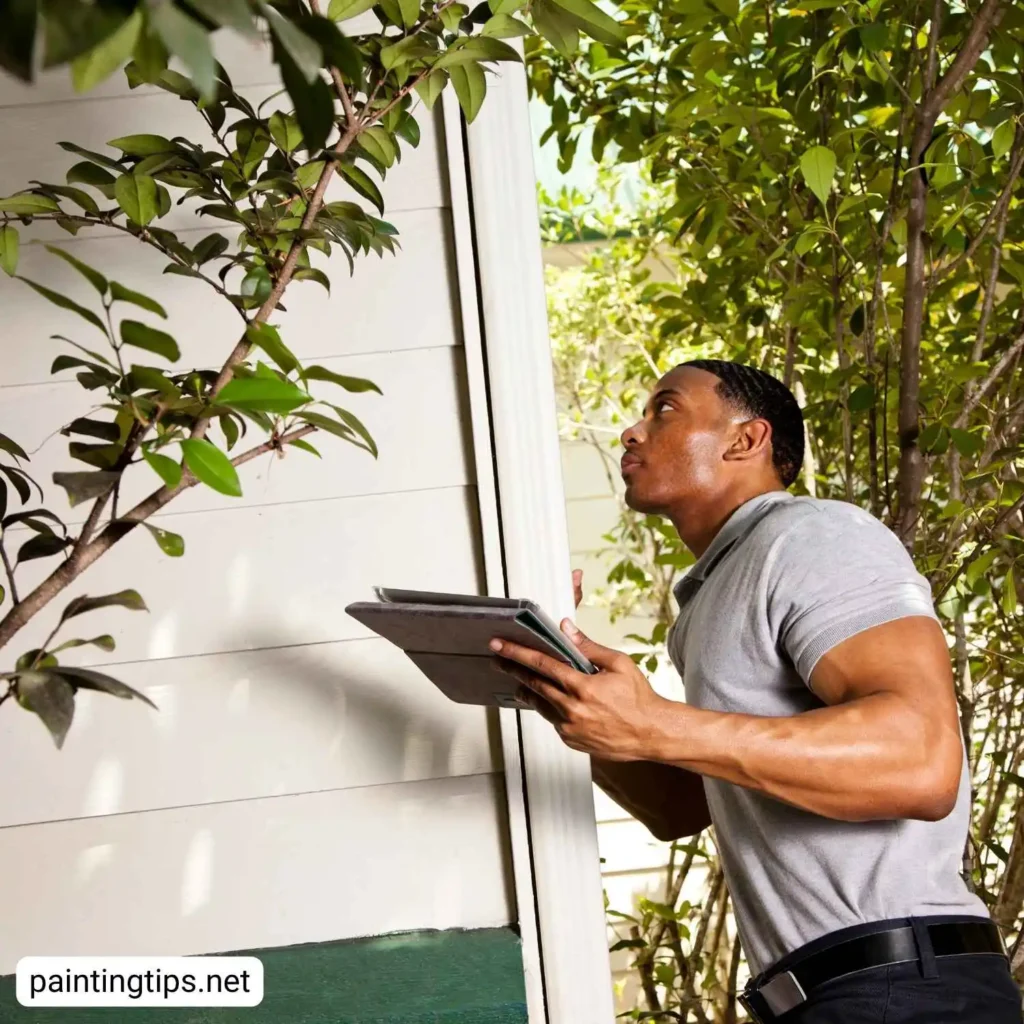
Take a good look at your home’s exterior. Don’t rush—check for peeling paint, cracked caulk, soft spots in the wood, or signs that water’s been sneaking in. Scan the brickwork and foundation, too. See any chalky stuff or cracks? If you spot real trouble, like damp areas or rotten wood, fix those before you even think about painting. Covering up problems just leads to bigger headaches later and your paint job won’t last.
A thorough inspection shows you how much prep work is needed and prevents the need for an early repaint. Whether you’re painting wood siding, stucco, fiber cement, or brick, each material requires specific attention.
2-Clean Thoroughly
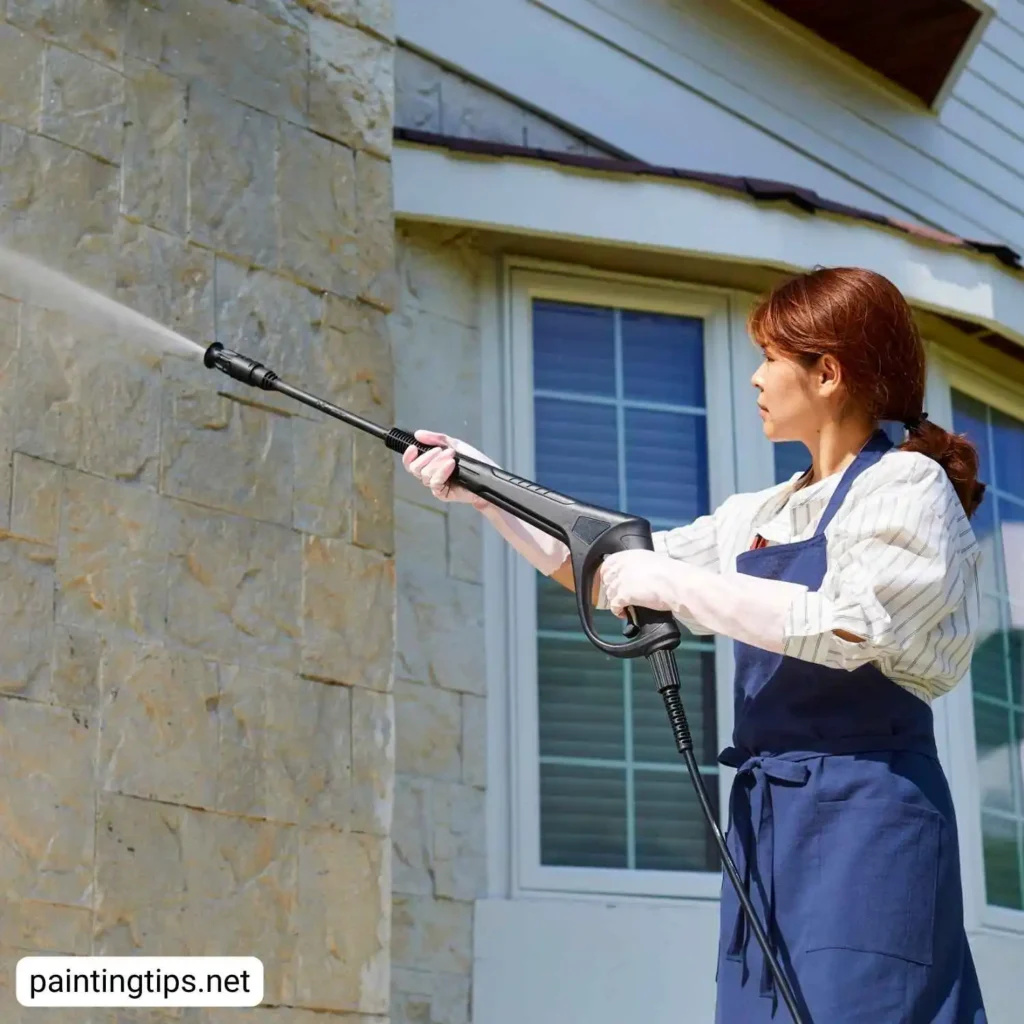
Start by giving everything a good, thorough cleaning. Dirt, mildew, any chalky stuff—get it all off. If you’re dealing with siding, a pressure washer set somewhere between 1,200 and 2,000 PSI works well. Don’t crank it up too high, though, or you’ll risk damaging the wood or pushing water where it shouldn’t go. For mildew, grab a bucket of water mixed with an exterior cleaner that has a mildewcide in it, then scrub the spots gently. Once you’re done, give the surfaces time to dry out. Depending on the weather, that usually takes a day or two before you can get started on the next step.
3-Scrape, Sand, and Repair
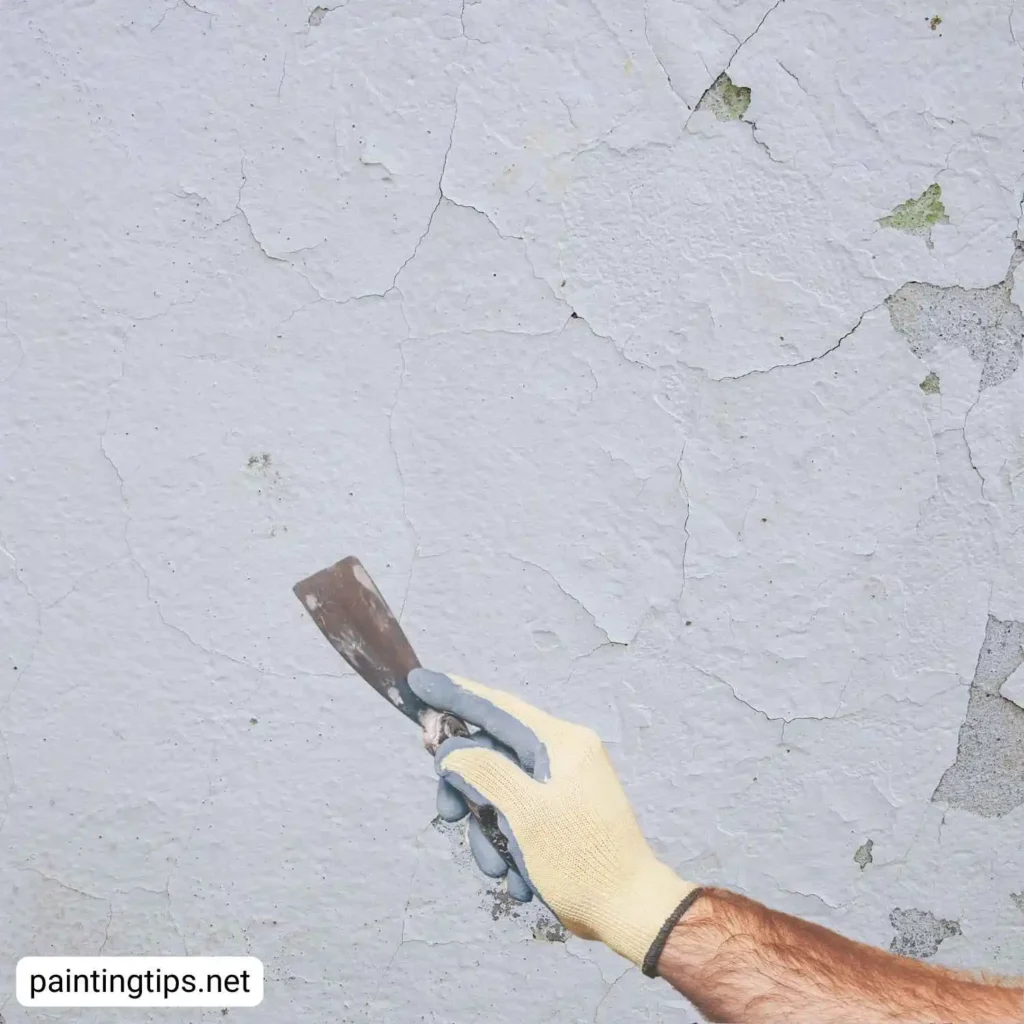
First, grab a scraper and get rid of any peeling or loose paint. Seriously, don’t paint over that stuff—it just causes headaches down the road. Once you’ve scraped, grab some sandpaper and smooth out the rough edges where the old paint meets bare wood. If the surface looks shiny, give it a quick scuff so your new paint actually sticks. Got cracks or holes? Fill them with exterior filler. And if you find any rotten boards, just replace them—patching won’t cut it. Take your time with this step. The more thorough you are with preparation, the more durable your paint job will be. Otherwise, you’ll be dealing with peeling paint again before you know it.
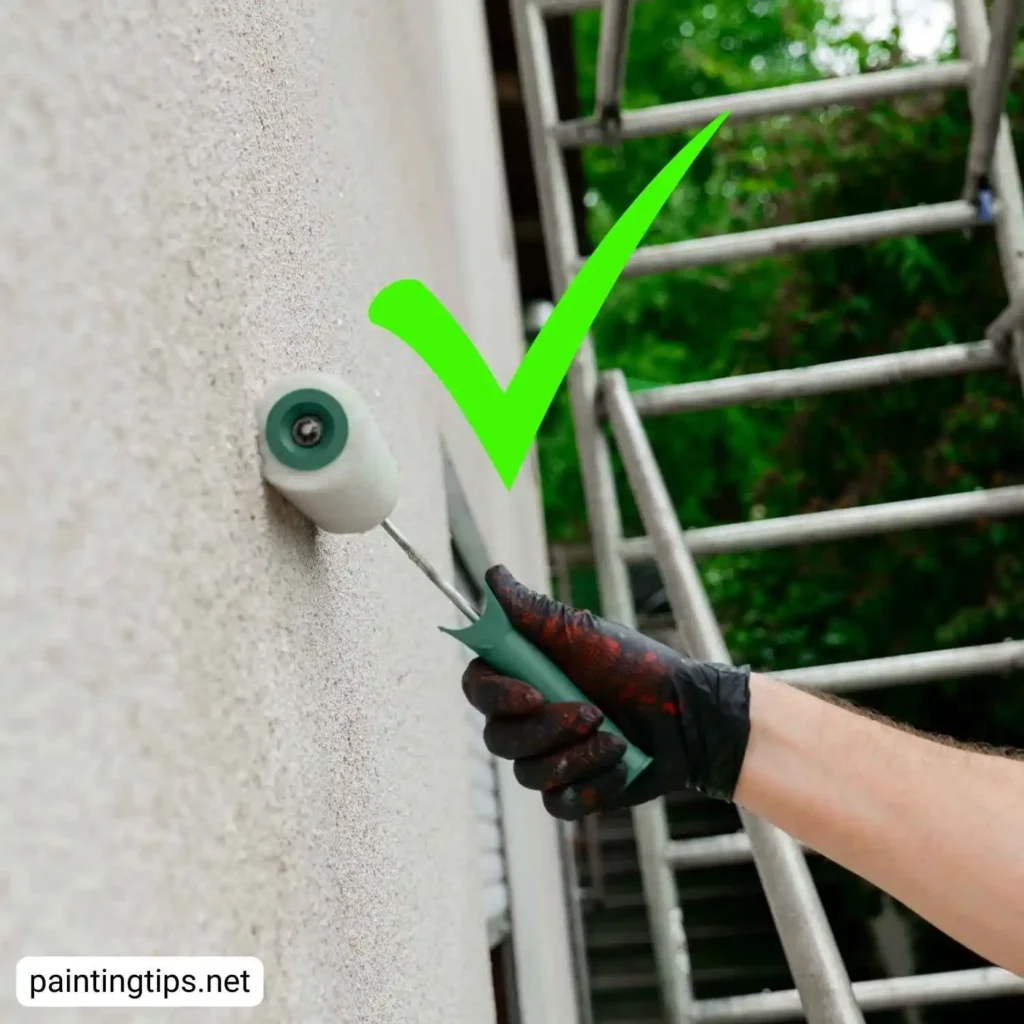
Seal gaps around doors, windows, and trim with a high-quality, paintable exterior caulk. Focus on vertical seams, but leave horizontal lap joints open to allow moisture to escape. Sealing the wrong spots can trap water and lead to peeling paint or wood rot. Follow manufacturer instructions for curing time before painting.
4-Prime Where Needed
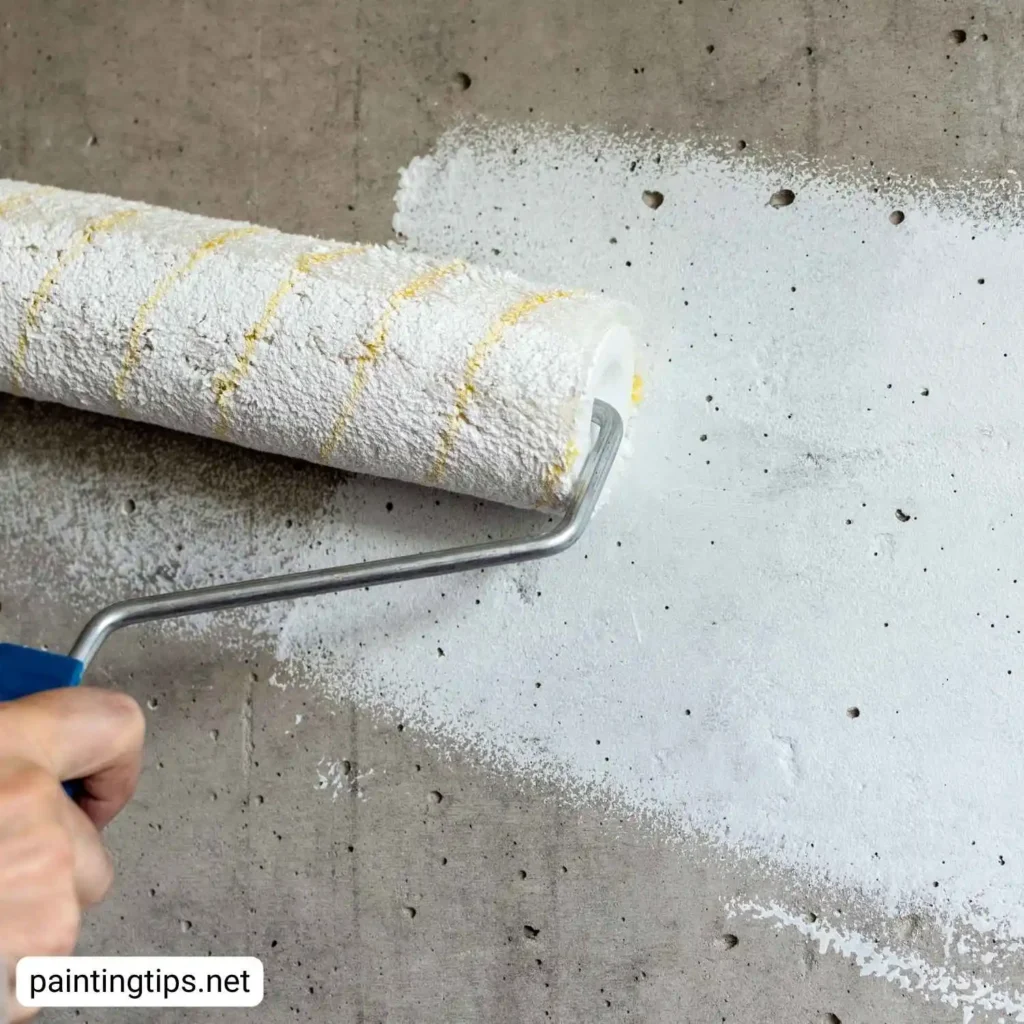
Apply primer to bare wood, patched areas, exposed metal, or any stains. Primer ensures an even base, helps the paint stick, and prevents dull spots (called flashing) from showing through.
Choose the primer based on surface type: bonding primer for glossy or tough-to-paint spots, and masonry primer for concrete or foundation walls. Priming only patched spots is fine for minor fixes, but when significant sections of old paint are stripped away, applying primer across the entire surface provides better long-term performance.
5-Apply Two Finish Coats
Always put on at least two coats if you want your paint job to last. The first coat covers and seals everything. The second one really locks in the color, makes the layer thicker, and helps protect your house from the weather. If you skip that second coat, you’ll end up with fading, patchy shine, and paint that doesn’t hold up well against moisture.
Give the paint at least two hours to dry before going over it again—or just check the label for the brand’s exact timing. If you rush, leftover solvents get trapped and the paint won’t stick right. But if the day’s hot and dry and you wait too long, dust might settle, so you’ll need to wipe it down before you add another coat. Move around the house in order, sticking to the shaded spots as you go. That way, you avoid lap marks and get a smoother finish.
If you’re painting in colder seasons, be sure to review our Cold Weather Painting guide for guidance on temperature limits, humidity levels, and techniques that help exterior paint cure and bond properly.
Long-Term Performance: Avoiding Failures and Getting Professional Results
Most of the time, exterior paint jobs don’t fail because of the paint itself—it’s the way the work gets done. Blisters pop up when someone paints over damp wood or works in direct sunlight. Peeling around trim or siding usually means the caulk didn’t stick or wasn’t applied right. And those streaky lap marks? That happens when you paint too fast in hot weather and let sections dry out before you catch up. The good news is, you can avoid all this with the right prep, good timing, and some patience with your technique.
A solid paint job does more than just make your place look good—it actually shields your home from the weather. Start by cleaning everything thoroughly. Fix any damage before you even think about painting. Use primer where it counts, then go over everything with two full coats of finish paint when the weather’s on your side. This kind of attention to detail is what gives you a paint job that lasts. Rushing just leads to headaches later. If you want results that hold up, slow down and do it right the first time.
Don’t forget to update smaller exterior areas too—see How to Paint a Balcony and Painted Garage Doors for tips on prepping, priming, and painting these surfaces for a professional, long-lasting finish.
How to Paint a House Exterior With a Brush?
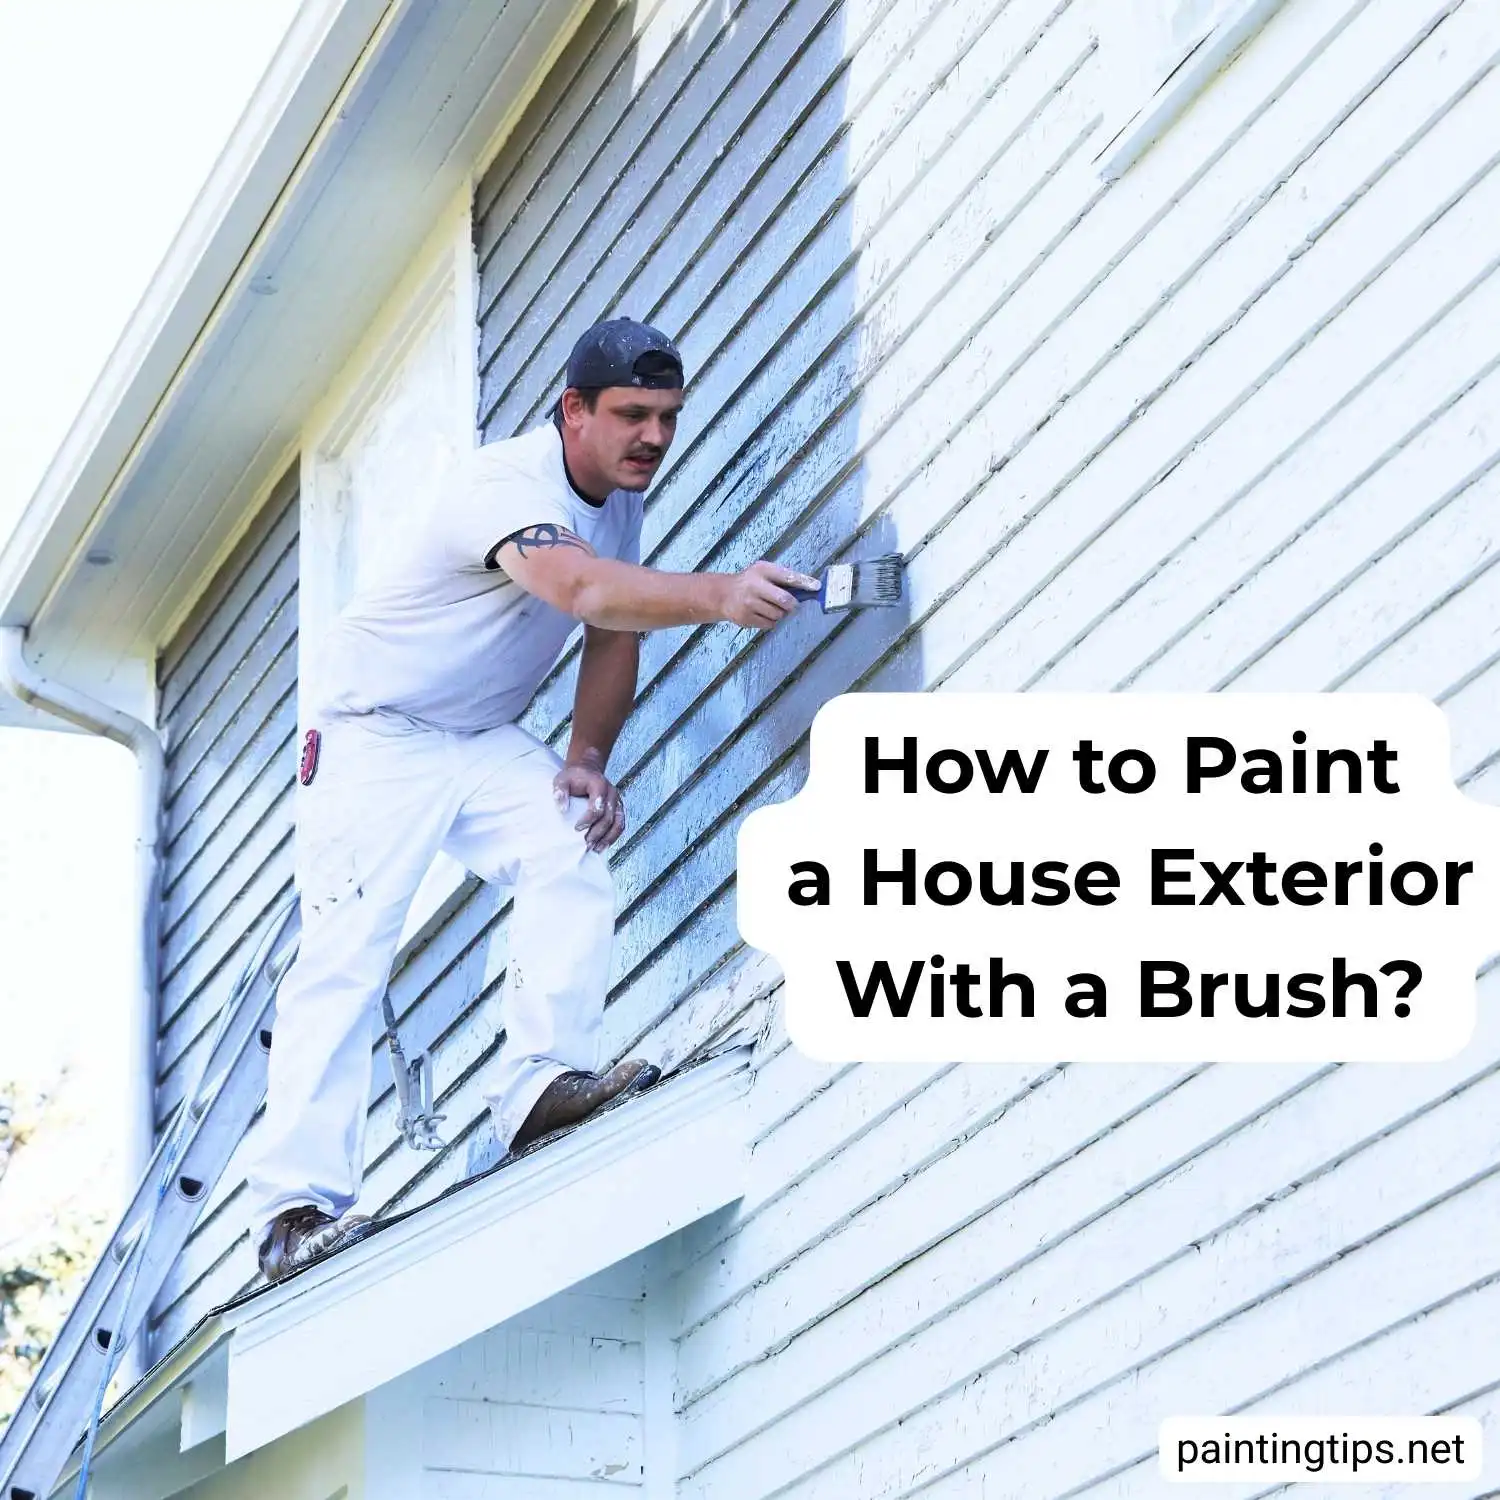
Brushing is the best way to paint the outside of a house, especially for trim, edges, and any areas that need precise control. Use a good synthetic bristle brush, about 2–3 inches wide for trim if you’re using latex paint. Load the brush evenly and apply in smooth, steady strokes, pushing the paint into the surface rather than just skimming it. Keeping a wet edge as you work helps avoid lines where one section dries before the next. Brushing may take longer than spraying, but it gives you better control and prevents paint from drifting onto windows, plants, or other surfaces.
How to Paint a House Exterior With a Sprayer?
If you need to cover large areas quickly, using a sprayer is an effective way to paint your house exterior. Always prepare the area first: mask off windows, plants, and nearby surfaces. Use overlapping passes and keep the nozzle steady to avoid streaks or patchy spots. For wood or fiber cement siding, rolling lightly after spraying helps the paint penetrate better and last longer. Avoid spraying on windy days to prevent overspray from landing where it shouldn’t.
Should Exterior House Paint Be Flat or Gloss?
Choosing the right finish for your house exterior depends on both appearance and durability. Flat paint hides surface imperfections but isn’t ideal for areas you’ll need to clean often. Satin is commonly chosen for siding because it’s durable, slightly shiny, and easy to maintain. Semi-gloss works well for trim, doors, and other details, resisting moisture and cleaning easily. High-gloss paint on siding is usually a poor choice—it highlights every bump or scratch. Selecting the correct sheen for your house exterior ensures a professional look that lasts.
How to Paint a House Foundation?
Painting a house foundation requires careful prep. Thoroughly wash the masonry surface, clear away any loose debris, and repair cracks using an appropriate masonry patching compound. Use paint specifically designed for masonry or concrete to allow moisture to escape—regular house paint will peel quickly if applied to a foundation. Proper drainage around the foundation is essential before painting. Following these steps ensures your house foundation will look great and remain protected for years.