This guide shows you real, workable ways to cover up a popcorn ceiling. No need to tear it out if you don’t want to. I’ll walk you through what actually works for different ceiling situations, how permanent each fix feels, and what you’re in for when it comes to cost, effort, and how the end result looks.
How to Cover Up a Popcorn Ceiling
Back when popcorn ceilings were the thing, builders loved them because they hid flaws and helped with noise. But let’s be honest, those perks don’t really make up for the headaches in most modern homes. They collect dust, cast weird shadows, and make simple updates—like painting or swapping out a light fixture—a pain. If you’ve got an older place, there’s also that nagging asbestos risk, which makes a lot of people think twice about scraping or sanding.

Popcorn ceilings were originally designed to hide construction flaws and reduce noise, but those benefits rarely outweigh their downsides in modern homes. Beyond their outdated appearance, they tend to trap dust and cobwebs, create uneven shadows, and complicate simple updates like painting or installing new lighting. In older houses, removal can also raise concerns about asbestos, making many homeowners understandably hesitant to scrape or sand the surface.
While covering a popcorn ceiling is often the cleaner and faster solution, complete removal may still be the right choice in some situations—especially if you’re planning major renovations or want a perfectly smooth surface. Homeowners who are evaluating that option can start with this detailed guide on how to remove popcorn ceiling, which explains the process, safety considerations, and what to expect before beginning. For a broader look at smoothing textured surfaces beyond popcorn finishes, this step-by-step resource on how to remove texture from ceiling covers additional techniques and scenarios where full removal makes sense.
But here’s the thing: you don’t have to remove it at all. Most of the time, covering it up is safer, quicker, and just easier. There are plenty of new materials and tricks that let you hide or tone down the popcorn look without any demolition. You can go for decorative panels, beadboard, drywall overlays, even those sleek stretch ceilings—there’s an option for quick fixes or forever upgrades.
The best method? Well, that depends. Think about your ceiling height, how thick or lumpy the texture is, the size of your room, and how permanent you want the change. Some options are all about being cheap and easy, while others focus on durability, boosting resale value, or just making a statement. Here are eight solid ways to cover up a popcorn ceiling, each one laid out with what really matters—what it costs, how it looks, and what you’ll need to do.
1-Wood Planks or Ceiling Panels
Want to go bold? Covering your popcorn ceiling with wood planks or engineered panels turns it into a feature, not something you’re hiding. Depending on the style you pick, you can swing rustic, modern, or something in between.
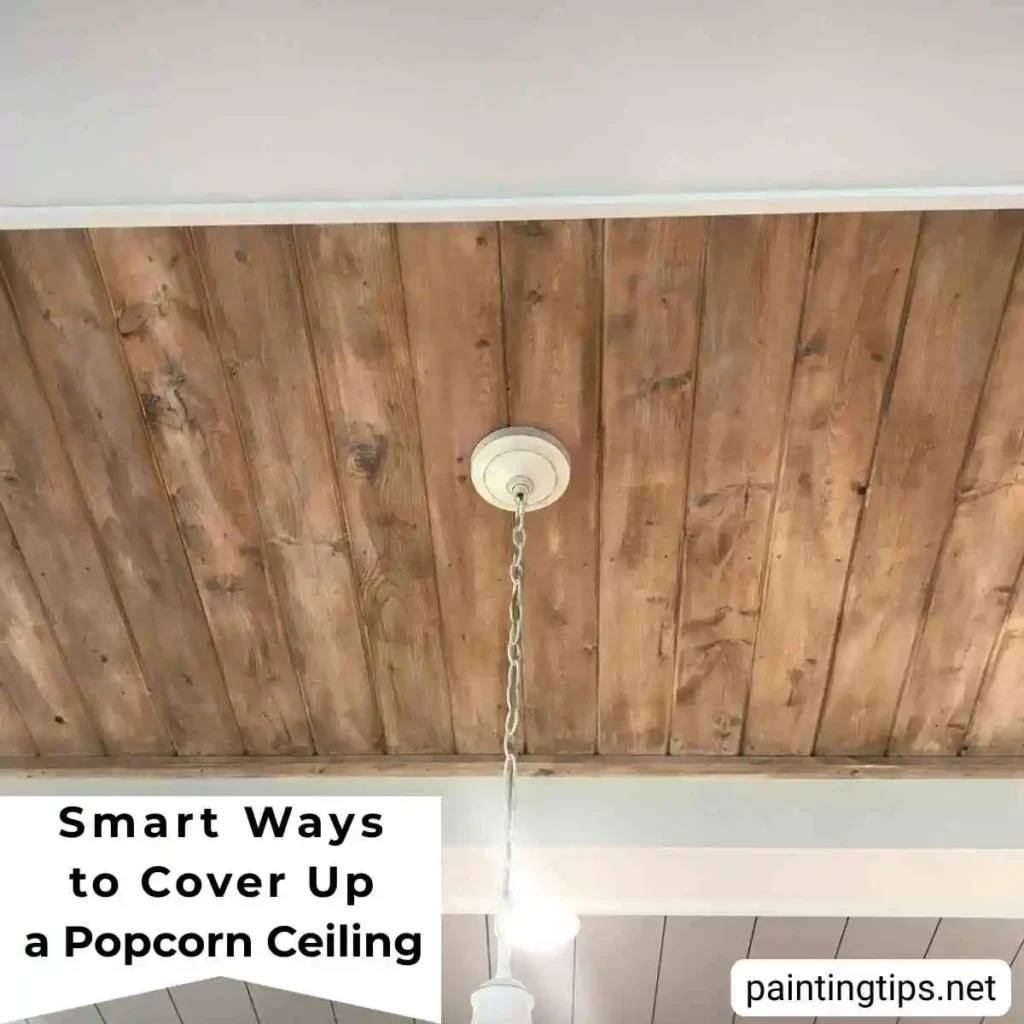
This one shines in living rooms and bedrooms where you’ve got a bit of ceiling height to spare. Today’s lightweight faux-wood or MDF panels make this much more doable than it used to be, though it’s definitely more of a design move than a quick cover-up. The big win here is that wood panels totally hide even the chunkiest popcorn texture and add a lot of warmth. Downsides? Materials cost more than paint, and you’ll need to measure and cut carefully. You’ll also lose a little height.
To install, find your ceiling joists, cut the panels, and fasten them right through the popcorn into the joists with nails, screws, or adhesive. Once everything’s up, finish the seams and fasteners, then paint or seal the surface—your choice.
2-Decorative Ceiling Tiles
Decorative tiles are made for exactly this job—covering up old ceilings fast. They come in PVC, polystyrene, even faux tin, and range from low-key to super ornate.

Tiles are great at hiding popcorn texture with almost no prep, and they go up pretty quickly. They can totally change the feel of a room. Just know that really fancy designs can look a bit much in small spaces, and cheap tiles can end up looking fake if you rush the install.
To put them up, clean the ceiling and plan out your layout (usually starting dead center). Stick the tiles on with construction adhesive, and sometimes tack them with small nails. Trim the edges to fit, and if you want a different color, you can paint them after they’re up.
3-Ceiling Wallpaper
Ceiling wallpaper is often dismissed outright, but on light to medium popcorn texture, it can be a surprisingly effective solution. Modern wallpapers are thicker, more flexible, and better suited to uneven surfaces than traditional paper wallpaper.
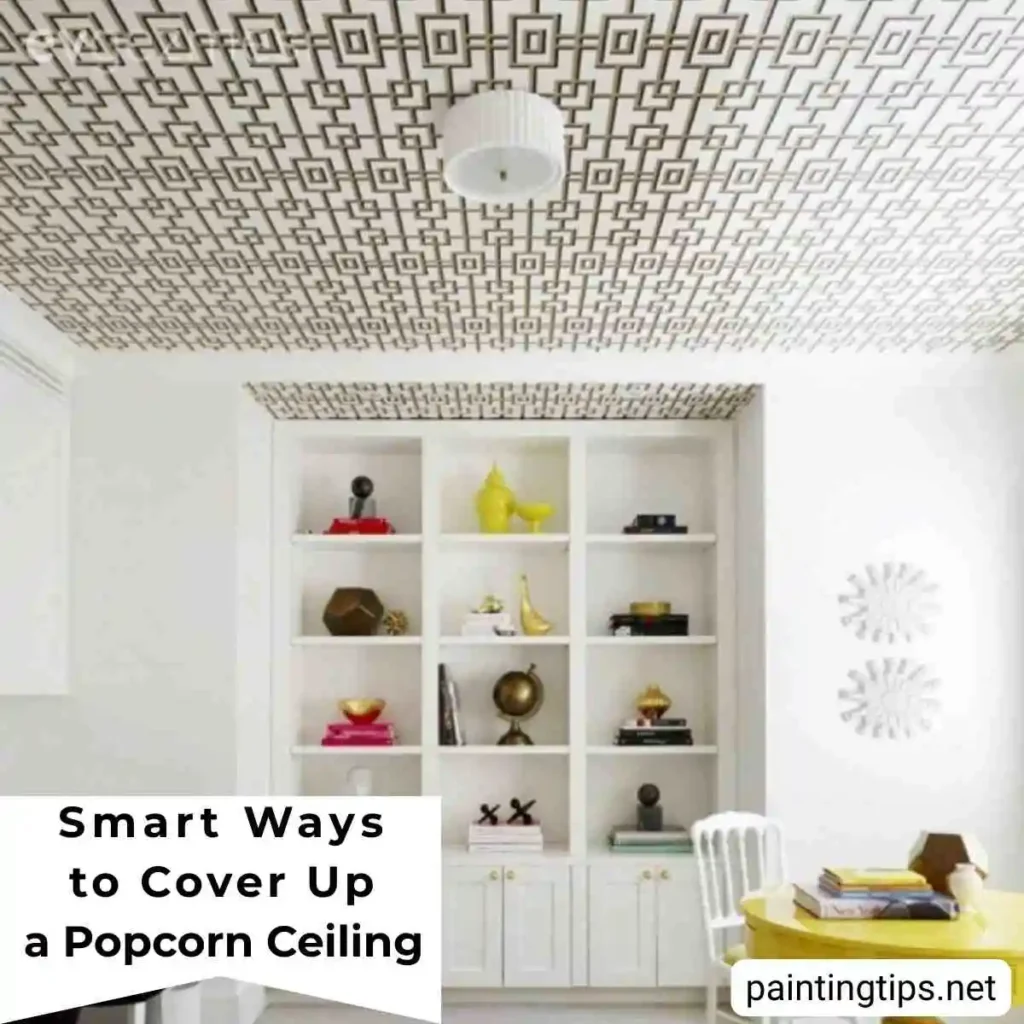
Wallpaper shines in smaller rooms, on accent ceilings, or anywhere you want a decorative punch without fussing over a perfectly flat finish. It’s affordable, reversible, and lets you change the look of a ceiling without anything permanent. Still, wallpaper only works if the popcorn texture isn’t too rough or flaky—if it is, the paper just won’t stick, and you’ll end up with a mess.
To install, start by scraping off any loose bits and cleaning the ceiling well. Brush on a high-adhesion wallpaper primer, then hang vinyl, non-woven, or fabric-backed wallpaper with a strong paste. Press it into place gently with soft tools—don’t force it into the popcorn or you’ll just tear the paper.
4-Beadboard or Tongue-and-Groove Panels
Beadboard ceilings have this calm, classic look that never really goes out of style. They don’t shout for attention like bold tiles or chunky wood planks. Instead, beadboard adds a subtle rhythm that just feels right.
You’ll see beadboard most often in kitchens, bathrooms, hallways, and mudrooms, but honestly, it looks great in living rooms too—especially when you paint it a soft, neutral color. It’s good for resale, doesn’t break the bank, and while it won’t totally reinvent the room like wood planks can, it does the job. The only real downside: you lose a tiny bit of ceiling height.
To put it up, install the panels across the ceiling joists and secure them with nails or screws. Hide the seams with trim, caulk the gaps, and paint everything for a crisp finish.
5-Skim Coating Over the Popcorn Texture
Skim coating is all about smoothing out popcorn ceilings by layering on joint compound until the bumps disappear. The popcorn stays underneath, but the ceiling ends up looking flat and modern.

The best thing here is you keep your ceiling height and don’t have to haul in new materials. But be warned—it’s messy, time-consuming, and actually takes some skill. If you rush or get sloppy, you’ll see waves and sanding marks when you’re done.
You start by priming the ceiling, then spread thin coats of joint compound with wide drywall knives. Let each coat dry, sand lightly, and repeat until it’s smooth. Once you’re happy, prime and paint it just like new drywall.
6-Installing Thin Drywall Over the Ceiling
If you want a ceiling that’s perfectly smooth and don’t mind the extra labor, covering the popcorn with thin drywall is one of the most reliable solutions. Instead of scraping or skim coating the existing texture, this method creates an entirely new ceiling surface underneath it.
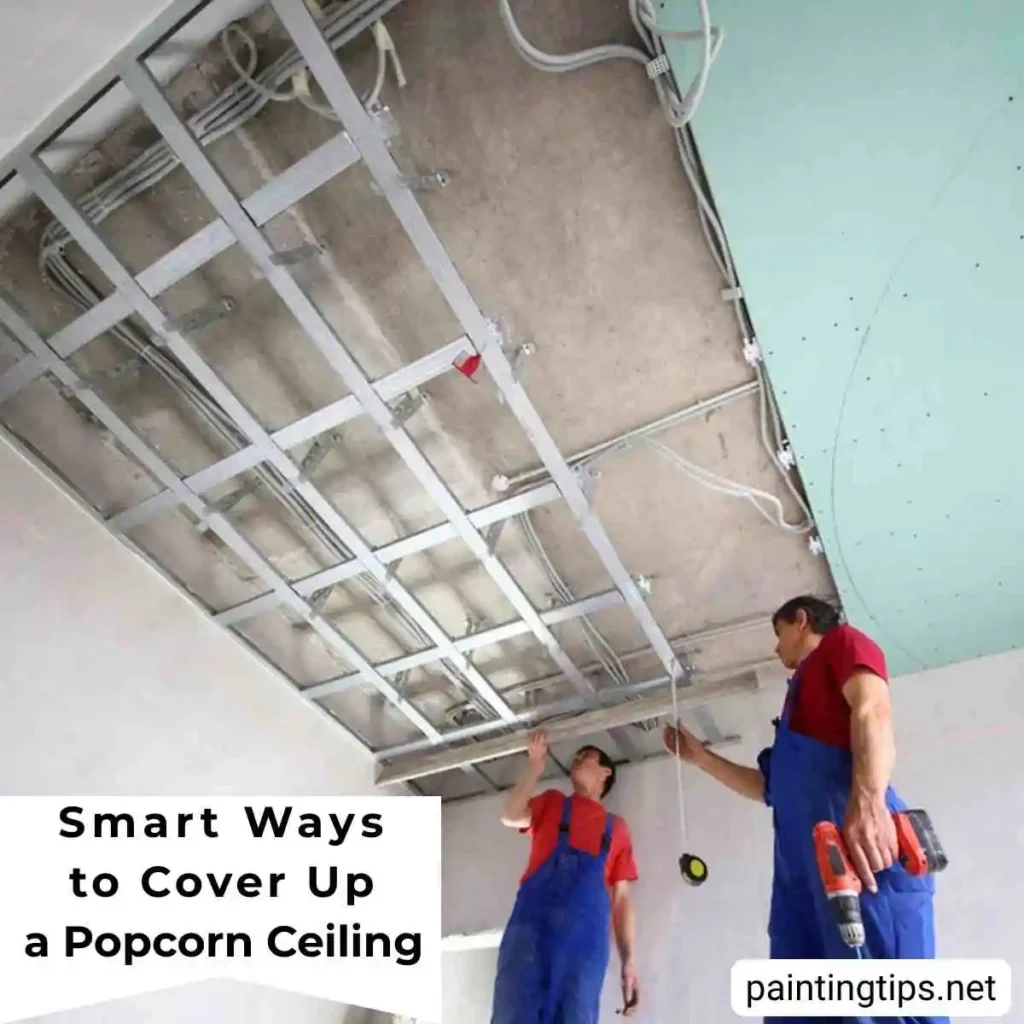
In most installations, metal furring channels or light-gauge steel profiles are first fastened to the ceiling joists. The drywall is then screwed to these profiles, not directly through the old ceiling. This approach helps level the surface, improves stability, and makes it easier to run new wiring or adjust lighting if needed. The result is a clean, modern ceiling that holds up over time, though it does reduce ceiling height slightly and requires a fair amount of physical work. Because of the tools and precision involved, this method is best suited for experienced DIYers or larger renovation projects.
Once the drywall is installed, the seams are taped, coated with joint compound, sanded smooth, and finished just like a new drywall ceiling. While the process is labor-intensive, it delivers a flawless, long-lasting result and completely hides the popcorn texture without the mess and risks of removal.
7-Paint and Decorative Coating Techniques
Painting won’t erase popcorn texture, but with the right tricks, you can make it fade into the background. Flat paint and textured coatings cut down on shadows and help disguise the bumps.

It’s the cheapest, simplest way to freshen up a lightly textured ceiling. Just know it won’t hide everything—think of it as a quick cosmetic fix, not a full makeover.
Prime the ceiling first, then paint with a thick-nap roller or a sprayer. Go for flat or matte finishes; glossy paint only highlights the texture you’re trying to hide.
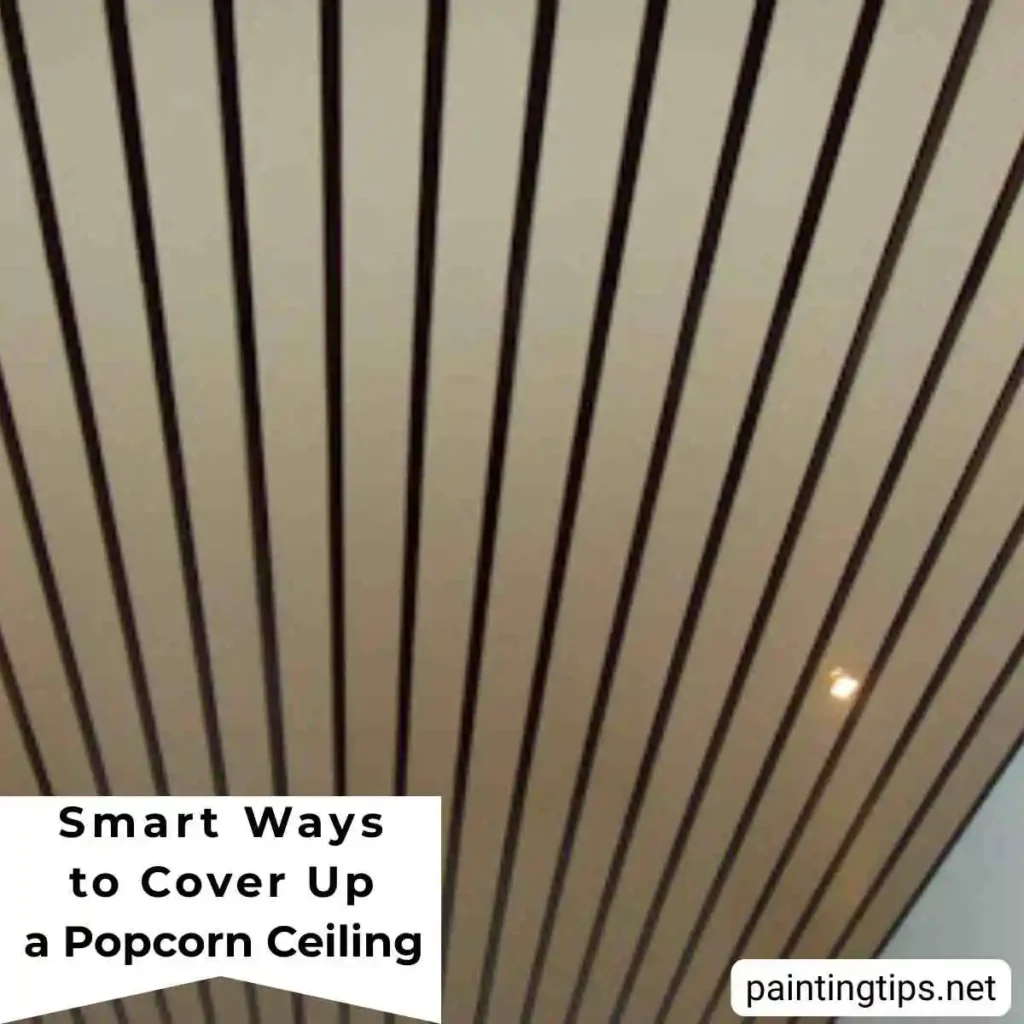
8-Stretch Ceilings or Modern Drop Ceilings
Stretch ceilings and new drop ceiling systems create a whole new surface under the old ceiling, totally hiding the popcorn texture. You can add built-in lighting and get a flawless finish.

These options look amazing and don’t make a big mess, but they’re pricey and will lower your ceiling a bit. Usually, you’ll need a pro for installation.
First, they put a track around the room, then mount a PVC membrane or new panels just below your original ceiling. Lighting gets reinstalled through reinforced openings in the new surface.
Final Thoughts on Covering a Popcorn Ceiling
Here’s the thing about popcorn ceilings: you don’t have to live with them, but you don’t have to rip them out either. Covering them up is usually easier, cleaner, and a lot less risky—especially if you’re worried about asbestos or just don’t want to deal with the mess. Whether you go for a fresh coat of paint, slap on some wallpaper, or get fancy with panels or beadboard, there’s something out there for every budget and skill set.
What works best really comes down to your space. Think about your ceiling height, how rough the texture is, and whether you want a quick fix or something built to last. Some options give your room an instant facelift, others add real value for the long haul. Either way, you’re not stuck with that bumpy ceiling. With the right approach, you can cover up a popcorn ceiling and never have to scrape a thing.